
Salt bread was never on my 2026 bingo card, but that is exactly why it became part of my From Scratch series. This recipe came as a recommendation from my lovely assistant, who always has her ears to the ground for the latest food trends taking over the internet. She told me salt bread was everywhere, and once I started paying attention, I saw it constantly. Those glossy, golden rolls with the delicate salt finish and buttery bottom were showing up on timelines, bakery counters, and home kitchens everywhere. The more I saw it, the more I realized this was something I needed to try for myself.
If I am being honest, I do not consider myself a baker. Cooking feels natural and intuitive to me, but baking requires patience, precision, and a willingness to slow down. Anything in the kitchen that requires meticulous effort can stress me out a little, not because I cannot do it, but because it forces me to be fully present and follow the process exactly. That is uncomfortable for someone who is used to improvising. But that discomfort is exactly why I decided to take on the challenge. What better way to overcome that fear than by testing a viral recipe that requires patience and intention from start to finish.
Salt bread, also known as shio pan, originated in Japan and has become popular worldwide for its unique texture and flavor. Unlike traditional dinner rolls, salt bread is known for its crisp, golden exterior and soft, airy interior. A large piece of butter is rolled inside the dough before baking, and as it melts, it creates steam that helps form the light interior while also crisping the bottom of the bread. The result is a roll that is buttery, slightly chewy, and perfectly balanced with a light sprinkle of flaky salt on top. Despite its simple ingredients, the technique is what makes salt bread so special.
My version was inspired by Erin from Erin’s Cozy Kitchen. I discovered her blog while researching the trend and was excited to learn she lives right here in New Jersey. Her salt bread always looks flawless, perfectly shaped with that signature golden finish. I would absolutely love to be in her kitchen one day while she bakes a batch of these because they are truly stunning. I have to admit, my version was not quite as visually perfect as hers, but I was surprised by how well they turned out on my first try. That alone made the process feel incredibly rewarding.
One thing I learned quickly is that salt bread is not a quick recipe. This is not something you decide to make casually in the middle of the day. From start to finish, the process takes about four to five hours. Most of that time is dedicated to allowing the dough to rise and develop properly, but it requires planning and patience. This is one of the main reasons I tend to avoid baking from scratch. It is not because I cannot do it, but because anything that requires meticulous timing and precision can trigger stress for me. However, pushing through that discomfort and completing the process was one of the most satisfying experiences I have had in the kitchen in a long time.
One challenge I experienced was getting the bread to brown properly. My salt bread took longer than expected to develop that deep golden color. I ended up baking it for about ten minutes longer than the original recipe suggested. I also switched my oven setting to roast toward the end to encourage more direct heat, which helped significantly. Another important step was creating steam in the oven by spraying water periodically during baking. The steam helps create that glossy, crisp exterior that makes salt bread so recognizable. These small adjustments made a noticeable difference in the final result.
The ingredients for salt bread are simple and accessible. You will need:
- Bread flour
- Cake flour
- Sugar
- Salt
- Instant yeast
- Powdered milk
- Ice water
- LOTS of butter
- Maldon flaky salt or pretzel salt
Making salt bread from scratch is a slow, intentional process that transforms a simple dough into soft, buttery rolls with a crisp golden exterior and airy interior. I followed Erin’s recipe exactly and the process began in a stand mixer using fast-acting yeast, which meant there was no need to activate the yeast separately. All of the ingredients were added directly into the mixer and combined on low speed until a shaggy dough formed. Once the dough came together, cold butter was added and the mixer speed was increased to medium. The dough mixed for about 20 minutes until it became smooth, elastic, and strong enough to pass the windowpane test, which is when you can stretch the dough thin enough to see light through it without tearing. This step is essential because it develops the gluten structure that gives salt bread its signature chewy yet airy texture.
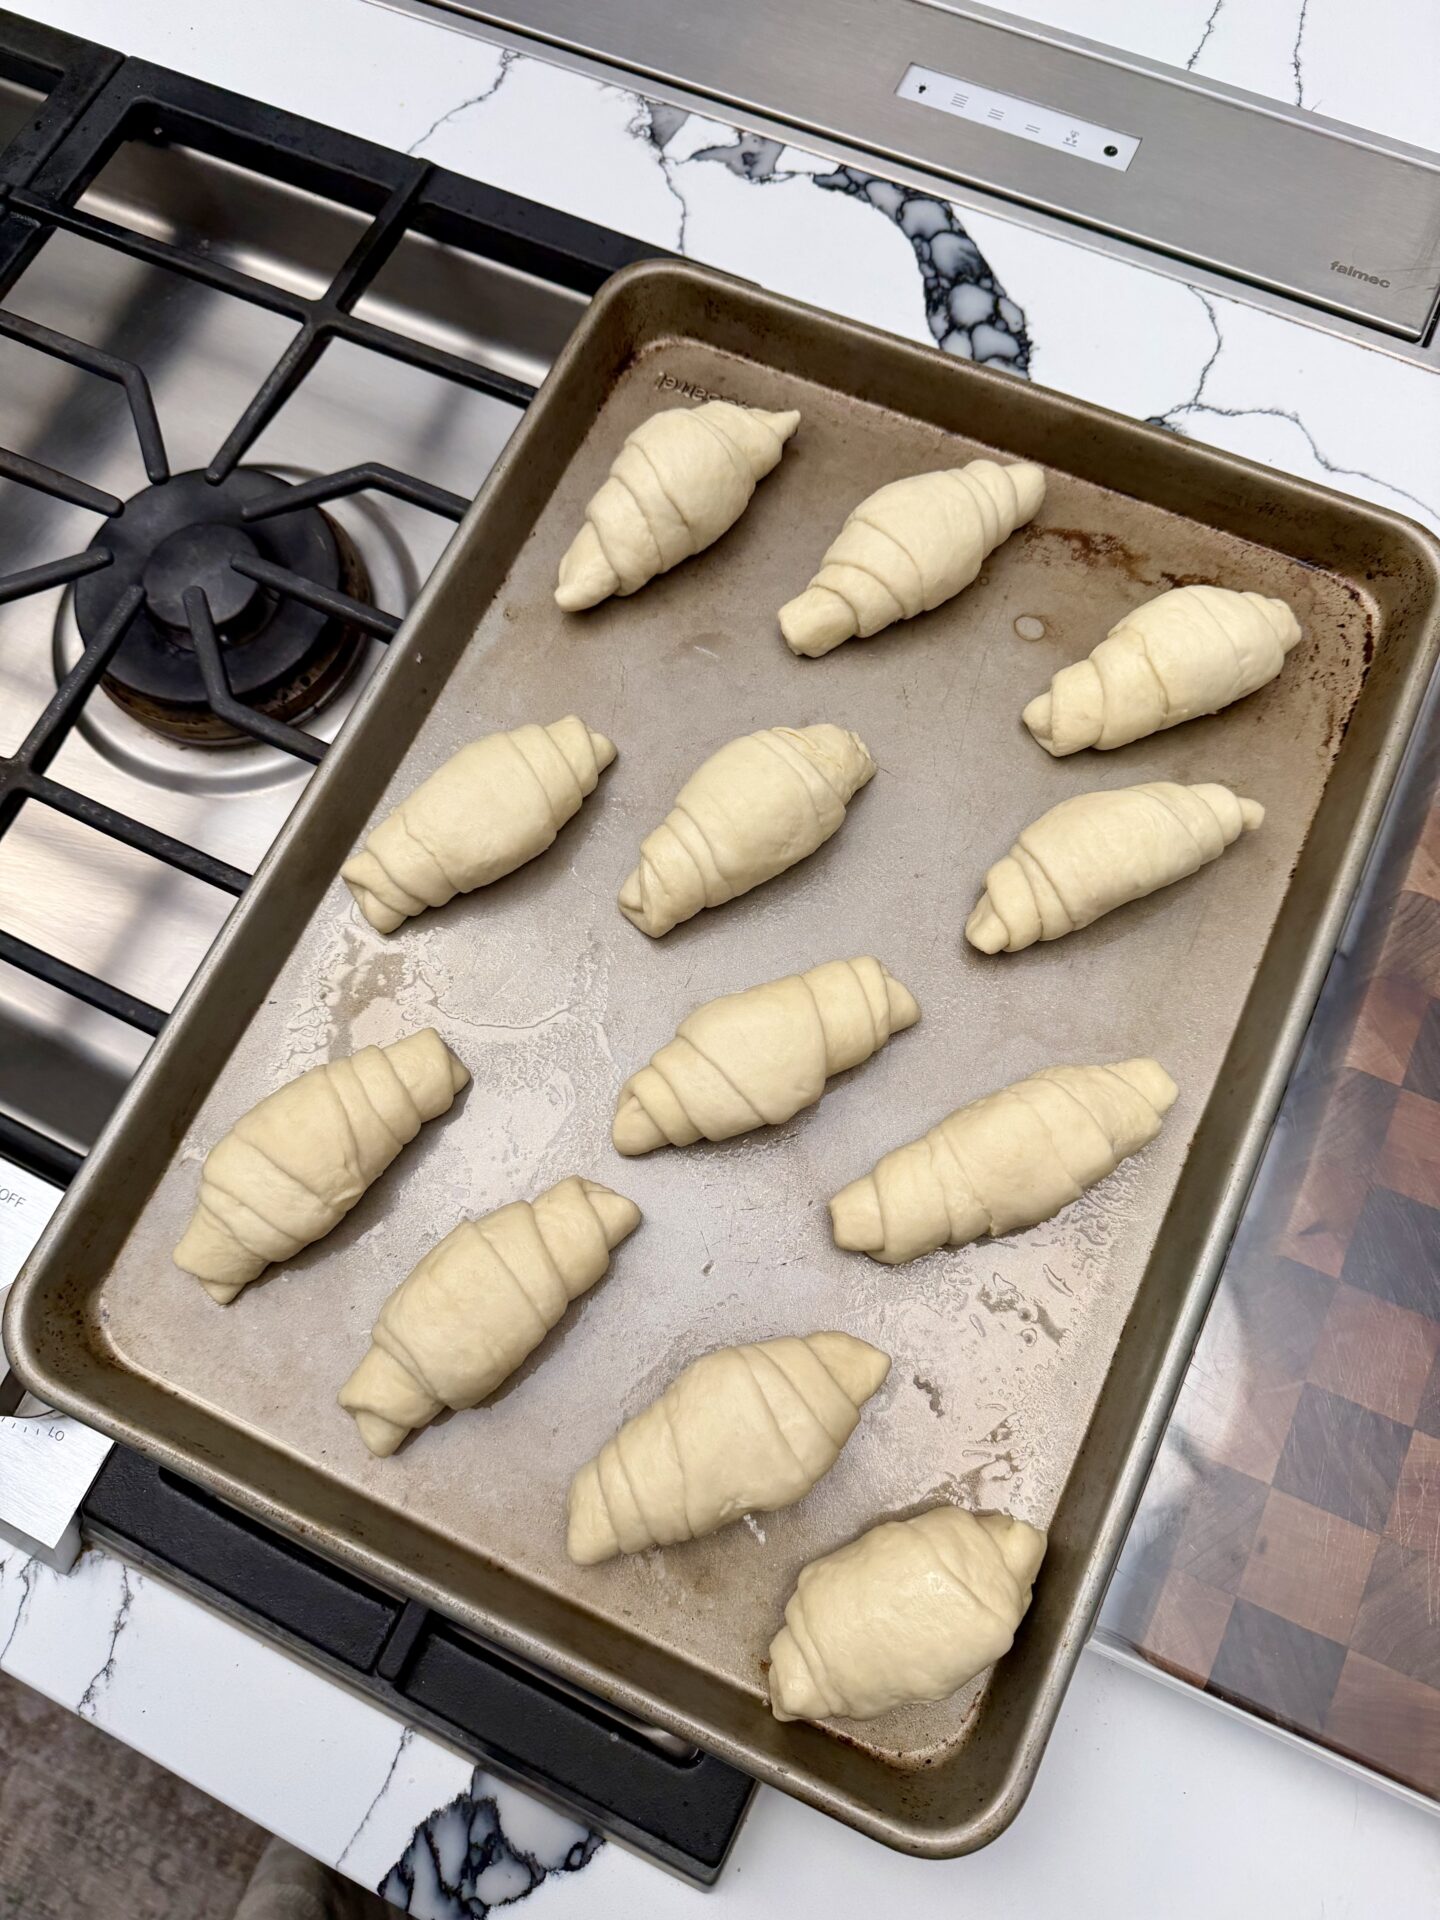
After mixing, the dough rested for about one hour, allowing it to relax and begin fermenting. I did poof mine in the oven by heating my oven to 200 then turning it off and adding a cup of hot water. This allowed my dough to rise effectively. Once it rose, the dough was divided evenly into 12 portions. Each portion rested again briefly, which made shaping easier and prevented the dough from snapping back. From there, each piece was rolled into a long, tapered shape, often described as a tadpole shape, with one end slightly thicker than the other. A large piece of cold butter was placed at the thicker end, and the dough was rolled tightly around it, sealing the butter inside. This butter is what creates the signature airy interior and slightly crisp, buttery bottom as it melts during baking.
Once shaped, the rolls rested again to allow the dough to rise and become lighter. Just before baking, the tops were sprinkled with salt and the oven was misted generously with water, as well as the bread itself, about 20 sprays, to create steam. This steam is critical for developing the glossy, crisp exterior that salt bread is known for. The rolls were then baked in a hot oven until golden brown, allowing the butter inside to melt and create that perfect balance of crisp exterior and soft, fluffy interior.
From start to finish, the process takes several hours, most of which is resting time. While it requires patience and trust in the process, the result is a bakery-quality salt bread with a delicate crust, airy center, and rich buttery flavor that makes every step worth it.
Salt bread stores well and can be enjoyed over several days. Store it in an airtight container at room temperature for up to two days. For longer storage, refrigerate it for up to five days or freeze it for up to two months. To reheat, place the bread in a 350 degree oven for five to eight minutes or in an air fryer at 325 degrees for three to five minutes. This helps restore the crisp exterior and soft interior. Avoid microwaving if possible, as it can soften the crust too much.
Making salt bread from scratch reminded me that the things we avoid are often the things that help us grow the most. Baking forced me to slow down, trust the process, and manage my stress in a way that cooking rarely requires. It showed me that my hesitation around baking has never been about ability, but about mindset. Completing this recipe gave me a sense of confidence and accomplishment that made the entire process worthwhile. Salt bread may have started as a viral trend, but for me, it became something much more meaningful. It became proof that stepping outside your comfort zone can lead to some of the most rewarding moments in the kitchen.